Do you want to access the fast, scalable, and eco-friendly Avalanche network using your MetaMask wallet? If so, you must first learn how to add Avalanche to MetaMask.
This article will show you how to do that in a few simple steps. You will also learn how to use AVAX Metamask to send and receive AVAX tokens, stake AVAX tokens, and interact with Avalanche DApps. By following this guide, you can enjoy the benefits of the Avalanche network with your MetaMask wallet in no time.
How to Install MetaMask Extension or App
Before adding Avalanche to MetaMask, you must install the MetaMask extension or app and create or import a wallet. Here are the steps to do that:
- Go to MetaMask official website and click on “Download” or “Install MetaMask for Chrome” (or your preferred browser). You will be redirected to the browser’s extension store, where MetaMask may be added to your browser.
- Alternatively, you can download the MetaMask app for iOS or Android devices from your app store. Use the QR code on the MetaMask website to also download the app.
- Once you have installed MetaMask, you will see a fox icon on your browser toolbar or mobile screen. Click on it to open MetaMask.
- A welcome page will appear when you launch the app, allowing you to create a new wallet or import a current one. If you already have a MetaMask wallet, you can import it by entering your secret recovery phrase. If not, you can create a new wallet by following the instructions.
- To create a new wallet, you need to agree to the terms of use and privacy policy and then set a strong password for your wallet. You also need to back up your secret recovery phrase, a 12-word phrase that, if lost, will give you access to your wallet once again. You should write down your secret recovery phrase and store it in a safe place. Do not share it with anyone or lose it; it is the only way to recover your wallet.
- After creating or importing your wallet, you will see your account page, where you can view your balance, transactions, and settings. You can add more accounts, change your network, and customize your wallet.
You have successfully installed the MetaMask extension or app and created or imported a wallet. You are now ready to add Avalanche to MetaMask.
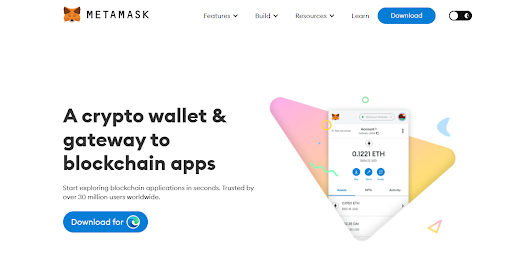
Open MetaMask official page
How to Connect MetaMask Wallet to Avalanche Network
One of the easiest ways to add Avalanche to MetaMask is to use the Avalanche Wallet, the official web wallet for the Avalanche network. The Avalanche Wallet can automatically add the Avalanche network to your MetaMask wallet with just a few clicks. Here are the steps to do that:
- Go to Avalanche Wallet’s official website and click “Connect” at the top right corner. You’ll see a menu of wallet choices, such as MetaMask, Ledger, Trezor, and more. Select “MetaMask” as your wallet option.
- You will be prompted to link your MetaMask wallet to the Avalanche wallet in a new window that appears. Click “Next” and “Connect” to approve the connection request. You may need to enter your MetaMask password if you still need to unlock your wallet.
- Once you have connected your MetaMask wallet to the Avalanche Wallet, you will see a dropdown menu at the top left corner, where you can choose the network you want to add to MetaMask. You can choose between Avalanche Mainnet C-Chain, Fuji Testnet C-Chain, or Custom RPC.
- Click “Add Network” after selecting the network you wish to add. You’ll see the network information in a new window, including the network name, RPC URL, chain ID, currency symbol, and explorer URL. Click on “Approve” to add the network to your MetaMask wallet.
- You will see a confirmation message on your MetaMask wallet, indicating that you have successfully added the network. You can also switch to the added network on MetaMask by clicking on the network name at the top of the wallet and selecting the network you want from the dropdown menu.
You have successfully added Avalanche to MetaMask using Avalanche Wallet. You may now access the Avalanche network and its DApps using your MetaMask wallet.
Connecting Avalanche to MetaMask
How to Add Avalanche to MetaMask Manually
Another way to add Avalanche to MetaMask is to do it manually using AVAX RPC and avalanche c chain settings. This method requires you to enter the network details yourself, which you can find on the Avalanche network profiles page. Here are the steps to do that:
- Open your MetaMask wallet and click on the network name at the top of the wallet. You will see a list of networks, such as Ethereum Mainnet, Ropsten Test Network, and more. At the bottom of the list, you will see an option to add a custom RPC network. Click on it to open a new window.
- In the new window, you will see a form where you can enter the network details. You need to fill in the following fields:
- Network Name: This is the network name you want to add. You can choose any name you like, but using a descriptive name, such as Avalanche Mainnet C-Chain or Fuji Testnet C-Chain, is recommended.
- New RPC URL: This node’s URL connects your MetaMask wallet to the network. You can find the RPC URL for each network on the “Avalanche network profiles” page. For example, the RPC URL for Avalanche Mainnet C-Chain is https://api.avax.network/ext/bc/C/RPC.
- Chain ID: This unique identifier for each network helps MetaMask distinguish between different networks. You can find the chain ID for each network on the “Avalanche network profiles” page. For example, the chain ID for Avalanche Mainnet C-Chain is 0xa86a.
- Currency Symbol (optional): This is the symbol of the native token of the network. For Avalanche networks, the currency symbol is AVAX.
- Block Explorer URL (optional): This is the URL of the block explorer that allows you to view transactions and blocks on the network. You can find the block explorer URL for each network on the “Avalanche network profiles” page. For example, the block explorer URL for Avalanche Mainnet C-Chain is https://cchain.explorer.AVAX.network.
- Click “Save” after completing all the fields to add the network to your MetaMask wallet. You will see a confirmation message on your MetaMask wallet, indicating that you have successfully added the network. You can also switch to the added network on MetaMask by clicking on the network name at the top of the wallet and selecting the network you want from the dropdown menu.
You have successfully added Avalanche to MetaMask manually using AVAX RPC and avalanche c chain settings. You may now access the Avalanche network and its DApps using your MetaMask wallet.
Avalanche Has Better Ecosystem Than Top Coins
How to Use AVAX MetaMask?
Now that you have add AVAX to MetaMask, you can use your MetaMask wallet to access the Avalanche network and its DApps.
You can also use your MetaMask wallet to send and receive AVAX tokens, stake AVAX tokens, and interact with Avalanche DApps. Here are some of the things you can do with AVAX MetaMask:
- Send and receive AVAX tokens: You can use your MetaMask wallet to send and receive AVAX tokens on the Avalanche network. To do that, switch to the Avalanche network on MetaMask and click “Send” or “Receive” at the bottom of the wallet. You can enter the recipient’s address or scan their QR code to send AVAX tokens. You can also copy your address or display your QR code to receive AVAX tokens. Additionally, you may modify the gas charge and the transaction speed to suit your preferences.
- Stake AVAX tokens: You can use your MetaMask wallet to stake AVAX tokens on the Avalanche network and earn rewards. You must switch to the Avalanche network on MetaMask and visit the “Avalanche Wallet” website. Click on “Earn” and select “Stake” or “Delegate” depending on whether you want to run a validator node or delegate your tokens to an existing validator. Enter the amount of AVAX you want to stake and select a staking period. Confirm the transaction details and wait for it to be processed.
- Interact with Avalanche DApps: You can use your MetaMask wallet to interact with various DApps on the Avalanche network, such as decentralized exchanges, lending platforms, gaming platforms, and more. To do that, you must switch to the Avalanche network on MetaMask and visit the DApp website. Click on “Connect Wallet” and select MetaMask as the wallet option. Approve the connection request and start using the DApp.
You have learned to use AVAX MetaMask to send and receive AVAX tokens, stake AVAX tokens, and interact with Avalanche DApps. You can now explore the Avalanche network and its DApps using your MetaMask wallet.
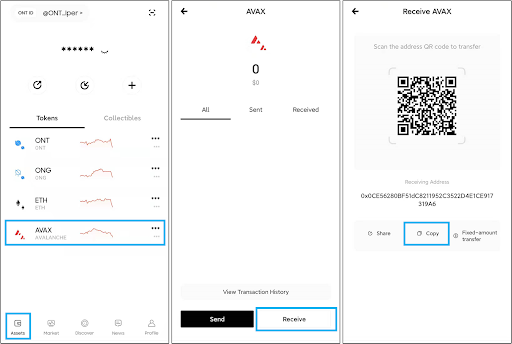
Receive AVAX tokens
Conclusion: The Benefits of Add Avalanche to MetaMask
Throughout this guide on how to add Avalanche to MetaMask, you have acquired proficiency in adding Avalanche to MetaMask by employing the Avalanche Wallet or manually configuring AVAX RPC and avalanche c chain settings.
Moreover, you have familiarized yourself with executing various actions within the AVAX metamask, such as sending and receiving AVAX tokens, staking AVAX tokens, and engaging with Avalanche DApps.
Consequently, by following these instructions, you have effectively unlocked the full potential of the Avalanche network with your trusty MetaMask wallet.
However, the question arises – why should you incorporate Avalanche into your MetaMask in the first place? What tangible benefits does this addition bring? Allow us to elucidate some reasons for doing so:
- Low fees: Embracing Avalanche on MetaMask translates to reduced transaction costs, making it an economically prudent choice for users.
- Fast transactions: With Avalanche integrated into your MetaMask, you can relish swift and seamless transaction processing, ensuring efficient and timely interactions.
- Eco-friendliness: By opting for Avalanche on MetaMask, you contribute to a more sustainable environment, thanks to the network’s eco-friendly consensus mechanism.
Access to Avalanche DeFi ecosystem: Including Avalanche on MetaMask opens up a gateway to the dynamic world of decentralized finance, offering an array of exciting opportunities.

The Benefits of Add Avalanche to MetaMask
FAQs
How do I send and receive AVAX tokens using MetaMask?
You can use your MetaMask wallet to send and receive AVAX tokens on the Avalanche network. To do that, switch to the Avalanche network on MetaMask and click “Send” or “Receive” at the bottom of the wallet.
You can enter the recipient’s address or scan their QR code to send AVAX tokens. You can also copy your address or display your QR code to receive AVAX tokens. Additionally, you may modify the gas charge and the transaction speed to suit your preferences.
How do I stack AVAX tokens using MetaMask?
You can use your MetaMask wallet to stake AVAX tokens on the Avalanche network and earn rewards.
You must switch to the Avalanche network on MetaMask and visit the “Avalanche Wallet” website. Click on “Earn” and select “Stake” or “Delegate” depending on whether you want to run a validator node or delegate your tokens to an existing validator.
Enter the amount of AVAX you want to stake and select a staking period. Confirm the transaction details and wait for it to be processed.
How do I swap tokens on the Avalanche network using MetaMask?
You can use your MetaMask wallet to swap tokens on the Avalanche network using decentralized exchanges (DEXs) that support the Avalanche network, such as Pangolin or Trader Joe’s.
You need to switch to the Avalanche network on MetaMask and visit the DEX website to do that. Click on “Connect Wallet” and select MetaMask as the wallet option. Approve the connection request and start swapping tokens.
How do I access Avalanche DApps using MetaMask?
You can use your MetaMask wallet to access various DApps on the Avalanche network, such as lending platforms, gaming platforms, and more.
To do that, you must switch to the Avalanche network on MetaMask and visit the DApp website. Click on “Connect Wallet” and select MetaMask as the wallet option. Approve the connection request and start using the DApp.